I bought a Tivo about 6 months ago knowing that Tivo was planning on releasing the Tivo ToGo feature sometime during 2004. Well, as it turns out, it took until early 2005 to release this software update so you could transfer the shows/movies/programs you record on your Tivo to your home computer. I had actually been using my VCR to transfer those shows to my computer prior to the release of the ToGo feature. It took a lot longer to accomplish, involved a lot more steps, but was doable. So, it kind of goes without saying that I was excited when Tivo finally got around to releasing this software update which meant I could transfer shows/movies/programs to my computer wirelessly then burn them onto a DVD for archiving.
But, as it turns out, Tivo decided to encode the programs so you can only watch them on a computer with the Tivo Desktop server software installed. Or, if you want to pay an additional $50+ you could buy a program from Sonic that would remove the drm encoding and allow you to burn the programs to DVD. I’m cheap (even though I bought and use a Tivo) and have no interest in purchasing additional software just so I can already use the software I have (Nero and video editing software) to burn shows to DVDs. So, I searched around a bit on the internet after the ToGo feature finally made it onto my Tivo (in February 2005, almost a month after they started releasing the feature) and found a way to remove the drm encoding so I could edit the programs – remove the commercials – and burn them with the software I already own.
My information for how to do this and links for the required programs can be found on this site:
http://andrewconnell.com/blog/archive/2005/01/22/868.aspx
While the process isn’t really that complicated, there are some specific steps that need to be taken and the directions on the site above aren’t perfectly clear. So, I figured I’d post my own directions with nifty pictures.
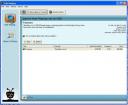
1) Of course you need to the Tivo desktop server software installed on your computer so you can transfer the shows. I’m not going to provide instructions on how to transfer programs to your computer as that is covered in detail by Tivo on their support site.
I will note, however, that Tivo shows are stored with the .TiVo file extension. Files with this file extension have the Tivo drm/encryption and whenever you try to open them to play them you will be prompted for a password (more on this below).
2) To remove the DRM/encryption, you need two other pieces of software:
-XMuxer
–GraphEdit
(I’ve provided the same links as are found on the site above. In case it is illegal to distribute or re-distribute the software, I’m just providing links to other locations where the software is available and not providing the actual software here.)
3) You’ll need to install both of these pieces of software. You should not need to change any of the default installation settings.
4) Once you’ve installed XMuxer and GraphEdit and have transferred a program to your computer, you’ll need to open GraphEdit.
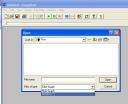
5) Inside GraphEdit you’ll want to open the program from which you want to remove the encryption/drm. You’ll notice that the default file extension for opening files in GraphEdit is as a ‘Filter Graph’ (see picture below). Change this to ‘All Files’ (see picture below). Then navigate to the folder where your TV file is stored.
6) Once you find the file you want to clean up, click on it and select open. Before it will open in GraphEdit, you need to provide the password Tivo requires to access files with the .TiVo extension:
7) Enter your password that you set when you installed the Tivo desktop server software and the file will open in GraphEdit and look something like this:
I don’t really claim any expertise on how this program functions, but if I’m not mistaken it basically is a graphical representation of the different pieces of software that are going to be involved in opening, decoding, and playing back the Tivo file.
8) Once you get it opened up, you’ll want to delete parts of the process so you can replace them with your own. You’ll want to delete everything after the ‘Moonlight-Elecard MPEG 2 Demultiplexer’ if you, in fact, have that included in the process. If that component is not included, you’ll want to delete everything after the actual show (the box with the ‘program name’ + the .Tivo extension). GraphEdit should now look like this:
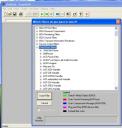
9) Now you need to insert your own pieces of software into the decoding process. To do this, you go up to the ‘Graph’ menu and select ‘Insert Filters’:
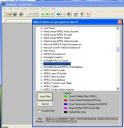
10) If you had the ‘Moonlight-Elecard MPEG 2 Demultiplexer’ already in the process, you only need to insert two elements. If you didn’t have it, you need to insert three. The filters/elements you need are found under the ‘DirectShow Filters’ submenu:
11) You want to insert the ‘Moonlight-Elecard MPEG 2 Demultiplexer’ first if you don’t already have it (picture not shown). You’ll then want to insert the ‘Moonlight MPEG2 MultipLEX’ filter (select it and hit ‘Insert Filter’):
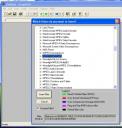
12) Next you’ll insert the ‘Moonlight DumpPos’ filter:
13) When you click on the ‘Moonlight DumpPos’ filter and hit ‘Insert Filter’, a prompt will pop up wanting to know where you want to store the output file. This is actually a very important part of the process that you don’t want to mess up. When this prompt comes up, you can choose to name the file whatever you want, but you need to specify the new file extension. I usually rename the file the same thing as it was previously named, but you have to make sure you change the .TiVo file extension to .mpeg. If you don’t do this, the file is virtually unusable because the drm/encryption is gone but it is still recognized as a Tivo file. In short, make sure you rename the file extension to .mpeg or the file is worthless:
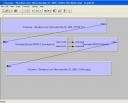
14) Once you’ve inserted all of the filters you need, you will then have to draw connections between them all. This can be a little annoying as everytime you draw a connection the program moves all of the filters into a line. Since I use dual monitors, I just expand the window so I can see everything, but it’s really just a simple matter of dragging everything onto the main window once they’re all connected (video goes to video, audio goes to audio). Your final GraphEdit window should look like this:
15) With all of the filters in place, all you have to do is hit the play button in GraphEdit. It will take a couple of minutes to process and output your new, encryption free .mpeg file, but that’s the gist of it:
16) The resulting file should be DVD compliant. If not, Nero or another DVD creation program should do whatever is necessary to convert it. I’m not providing instructions on turning the actual file into a DVD, for that you’ll need additional software – so you can use the instructions that come with it.
17) One last thing… In trying this process I have found that the resulting video footage can be pretty crappy. I have had some TV shows turn out absolutely worthless with stuttering and frames freezing. However, bad video footage usually isn’t a problem. Where I usually do have a problem, and this is with almost every file, is the audio and video get out of synch (there’s usually a 20 frame lag between audio and video). I’m not sure what causes this, but I usually end up using a video editing program to cut out the commercials anyway, so I adjust the audio and video to get them resynched during that process then output them from there as DVD compatible mpeg files. If anyone has any suggestions as to why my audio and video are not synched after removing the drm/encryption, please let me know.
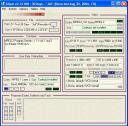
Note: You can put other videos back on the Tivo and they don’t have to have come from the Tivo to begin with. They just have to be in the same format that Tivo uses, which is an MPEG2 format. This screenshot from the program GSpot reveals the settings you should use if you want to convert a video into a format compatible with Tivo. It’s basically SVCD format, if you have that option:
![]()






Leave a Reply