I’ve used LimeSurvey for a long time and really like the software. It’s powerful, yet very easy to use. But one thing I couldn’t figure out with the software was how to assign participants to one of several conditions within a single survey. For example, if you want to randomly assign participants in your survey to one of three groups and one of those groups will see some intervention, another group will see a different intervention, and the third group will see a control condition, as in an experimental design, I couldn’t figure out how to do that before. Turns out, it is possible. I found this tutorial that explained it, but it wasn’t all that clear, so I’m creating a tutorial here to make it very clear how this works.
What I wanted to do is like the hypothetical scenario I described above. I am conducting a survey and have two experimental conditions; participants are going to read one of two vignettes that are designed to influence them in specific ways and one control condition in which the vignette is designed not to influence participants in any way. I want to randomly assign every person who takes the survey to one of these three conditions so they only see one of the three vignettes. Here’s how you do this.
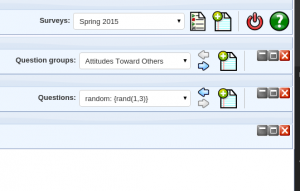
First, you have to create a variable in LimeSurvey that randomly assigns each participant to one of the groups. This should basically be the first variable in your survey. But, the key is that you don’t let participants see the variable. So, you add a new question to your first Question group:
You can name that variable whatever you want (this goes in the Code: box), but I named mine “random.”
Then, you need to choose the type of question. Go down to where it says “Question type:” and select “Equation”:
The equation itself goes in the “Question:” box, like this:
The equation you use is the following:
{rand(1,3)}
What this equation tells LimeSurvey to do is to select a random number between 1 and 3 (the two values in the parentheses) and assign that to this particular participant (if you have more conditions, you can increase the number of groups by increasing the second integer – i.e., change 3 to 4, 5, 6, etc.).
You have to do one more thing before you’re done creating the question. Go down to “Show advanced settings” and click on it. It will open the advanced settings options. Scroll down to where it says, “Always hide this question” and select “Yes” from the drop down menu. This tells LimeSurvey that you don’t want participants to see this question. Once you’ve done that, click on “Save” and you’ve now created the variable that randomly assigns participants to one of the three conditions.
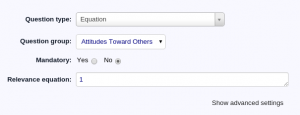
You’ve finished the hard part. Now you have to tell LimeSurvey which variables go with which randomly assigned numbers and their corresponding conditions. You do this while creating the questions. So, start creating the questions you want the participants in each of the groups or conditions to see (these should obviously be in a later question group than the above question, or the branching won’t work). While creating the question, scroll down to where it says, “Relevance equation”. In that box is where you’re going to add the necessary code to assign each question to a randomly assigned condition. The code you’ll use is the following:
- for those assigned to condition 1, add to that box: ((random==1))
- for those assigned to condition 2, add to that box: ((random==2))
- for those assigned to condition 3, add to that box: ((random==3))
It should look like this:
Once you’ve added the Relevance equations and hit “Save”, now you can test the survey. You should be randomly assigned to a different condition each time and see only the questions that meet the relevance equation criteria – meaning, if you were randomly assigned to condition 1, you’ll only see the questions assigned to that condition, ditto with condition 2 and condition 3.
And there you have it – you have created a survey that includes random assignment to different conditions.
![]()


Leave a Reply