While Ubuntu does about 95% of what I need my OS to do, there are a few things it doesn’t do (or at least doesn’t do well). I occasionally need to recognize the text of documents. There are a few programs for this for Linux OSes, but they all suck – really, they do. Since I had this software under Windows, I’ve resorted to running Windows in an emulator, Virtualbox (which is free from Sun for home users), and running my text recognition software in that OS (I use Omnipage 16, which is pretty good).
As for how to set up Virtualbox in the first place, I give basic instructions for the non-free version below. But the focus of this post is one feature of Virtualbox that is not particularly intuitive and I have a hard time remembering how to do it every time I need to, so I’m going to write up how it is done so I remember and so others can see how this is done.
Because I’m scanning into Omnipage, I need Virtualbox to recognize my USB ports and pass them on to the emulated OS – Windows XP – so Omnipage can recognize my scanners. This is possible, but requires a bit of know how.
1) You can’t use the version of Virtualbox that ships with Ubuntu. That version is called the “free” version, but it is really just the version that is compatible with the “free software” licenses and philosophy of Ubuntu. You actually need the “free for home users” version available from Sun here (also called the “non-free” version). The easiest way to install this is to add the virtualbox download location to your list of repositories in the Synaptic Package Manger (System->Administration->Synaptic Package Manager). All you need to do is find the line that matches your OS version, copy it, and paste it into the repositories list in the Synaptic Package Manager. For example:
deb http://download.virtualbox.org/virtualbox/debian/ jaunty non-free
For those who don’t know what I’m saying, here are a couple of screenshots to help:
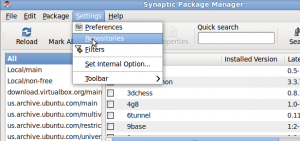
Open the Synaptic Package Manager and, at the top, click on “Settings->Repositories”:
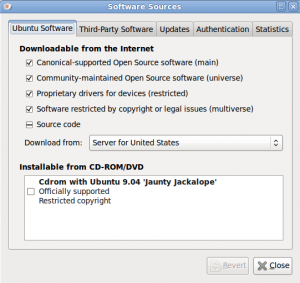
This will open this window:
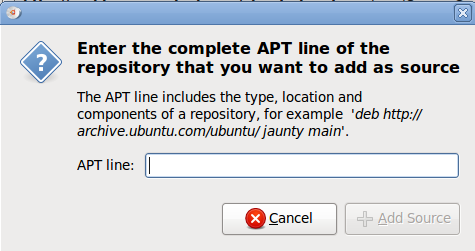
Select the “Third-Party Software” tab. Then click on “Add…” You’ll get this window:
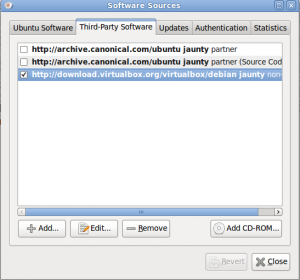
Now, that line you copied from the Virtualbox download site, paste it here and hit “Add Source”. Once you do that, you’ll see that there is a new line under the “Third-Party Software” tab:
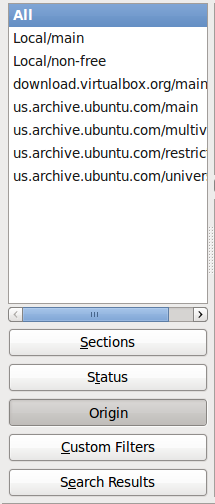
Close that window and you’ll be back to the main window of the Synaptic Package Manager. Now, click on the “Origin” button on the lower left and you can see all the packages available based on the repository:
Select the line that says “download.virtualbox.org/main” and you’ll see “virtualbox” listed there. Select the latest version and then hit “Apply.” Voila, you have Virtualbox installed.
2) The second step, in order to enable USB support, is to add your “user” to the Virtualbox “group”. I don’t know enough about Ubuntu/Linux to know what’s going on here other than to assume that this is security related. But this part can be a pain in the butt. The easiest way I found to do this is to use the terminal. Type the following in the terminal, replacing “USER” with your user (whatever you use to log in to Ubuntu):
sudo adduser USER vboxusers
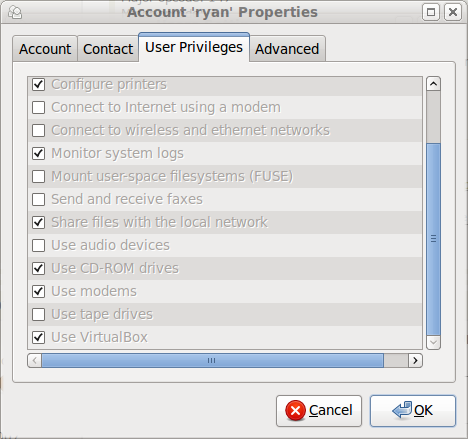
If you want to check to see if you have been added to the “vobxusers” group, you can do this by going to System->Administration->Users and Groups. Click on your user and then click on “Properties”. A new window will pop up. If you scroll to the bottom, you should see a check next to “Use Virtualbox”:
3) It is important at this point to log out, then log back in. If you don’t do this, these directions won’t work.
4) Now, start Virtualbox. Again, I’m not going to give you directions for setting up a virtual machine in Virtualbox. You can read the Virtualbox documentation for that. I’m just going to cover the one aspect that I intended to cover in this post: USB support.
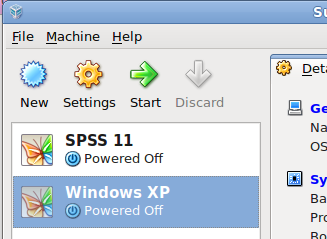
A note about Virtualbox is important here. You can’t change the settings for a virtual machine unless you “shut down” that machine. That means you can’t just “save the state” of the machine and then try to change the settings. You have to shut it down, then you can click on the “settings” button. So, once you’ve got your virtual machine set up and shut down, click on the “settings” button:
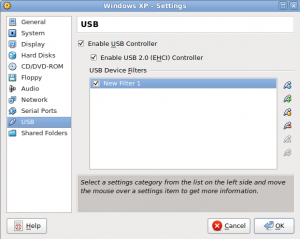
5) Now click where it says “USB”. You’ll get this window:
Simply click on “Enable USB Controller” then click on “Enable USB 2.0 (EHCI) Controller)”.
Then, click on the top button on the right (with the blue circle). This is an empty filter. You don’t need to name it anything at all, just add it. Then hit “OK”. There you go, it should work.
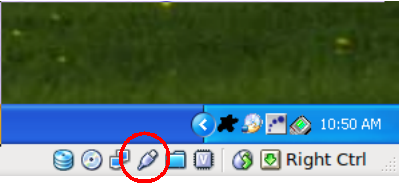
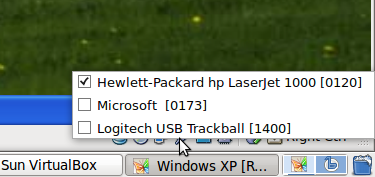
Now, start your virtual machine, and at the bottom right you should see a little USB icon. If you right click it, you should be able to pass anything connected to your Ubuntu machine’s USB ports through to the virtual machine:
A couple of notes:
First, if you install the Virtualbox Guest Additions, you don’t have to send your USB mouse and keyboard through to the virtual machine – they will work fine between the Linux OS and the emulated OS. In fact, if you do click on the box to send them through, what will happen is that they will stop working in the Linux OS and will only work in the emulated OS, so don’t do it.
Second, if you have a printer that worked under Windows but doesn’t work under Linux (e.g., the HP LaserJet 1000, which apparently has the world’s worst driver), this is a good but cumbersome way to get that printer to work. Yeah, you basically have to send everything through to the Windows OS using the networked folders, but you can get your printer to work this way.
![]()
Leave a Reply